> For the complete documentation index, see [llms.txt](https://docs.eazybackup.com/llms.txt). Markdown versions of documentation pages are available by appending `.md` to page URLs; this page is available as [Markdown](https://docs.eazybackup.com/guides/how-to-move-your-backup-to-a-new-computer.md).
# How to move your backup to a new computer
If you are replacing a computer and would like to tranfer your backup to the new computer, the guide will explain the process.
#### What You’ll Need
Before we begin, you will need the following:
* The Username of your backup account
* The Password associated with the backup account
* A copy of the eazyBackup software on your new computer
* The **bucket name** you’ll use for backups
1. You can find your account Username(s) on the Dashboard -> Users page.
2. If don't know the password associated with the backup account, you can reset the account password from the Dashboard -> User Profile page.
2. Download a copy of the eazyBackup software from the 'Download' menu in the client area. You can choose a platform version that matches the OS of new your replacement computer.
4. Install the eazyBackup software on your new computer. Open the application and sign-in with your account Username and Password.
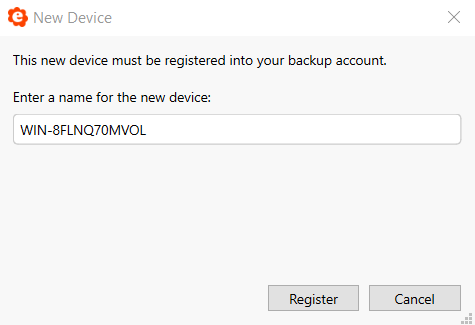
5. You will be prompted to register the new computer. Give the computer a name press 'Register' to add the new computer to your account.
6. Once the new computer has been registered, you can create a new [Protected Item](/guides/creating-protected-items.md). Select the files you want included in the backup and configure your schedule.
{% hint style="info" %}
For advanced users, rather than creating a new Protected Item, you can [copy the Protected Item](/documentation/copy-a-protected-item-configuration-to-new-device.md) from your old computer to the new computer.
{% endhint %}
{% hint style="warning" %}
If you have configured custom retention rules on your Protected Item, you will need to [copy the Protected Item](/documentation/copy-a-protected-item-configuration-to-new-device.md) to retain the retention data.
{% endhint %}
7. If you no longer plan to perform backups from the old computer, you should to Revoke the device from your account to stop billing.
* From Dashboard -> User -> Devices page, click on the 'Manage' button.
* From the menu that opens, select the 'Revoke' option.
{% hint style="warning" %}
When you revoke a Device, it's Protected Items and retention rules will be deleted. Backup data from the revoked Device will remain in your Storage Vault for the length of time determined by the Vault retention policy (default 30-days). You can [restore data from a revoked device](/documentation/restore-from-deleted-protected-item.md), if needed.
{% endhint %}